
DahliaOS seems to gain in popularity each day. For those uninformed, DahliaOS is a new Linux distribution that combines the good in both Linux and Fuchsia. Recently, I also shared an article in which I was able to run DahliaOS on my PS4. DahliaOS is still in its pre-release stage. But, that doesn’t mean, you as a dev can’t tinker with it to make it better. So, how to build/compile DahliaOS from source? That is what we will be discussing in this article.
DahliaOS uses buildroot to compile the system images (iso, cpio, etc.) That makes the compilation easy. But, as a beginner, setting up a build environment for DahliaOS and successfully building the OS could be a nightmare for many. If you do follow this article to a T, you will have DahliaOS images for your system compiled in no time.
We will begin with the basic requirements for this.
Requirements
Linux OS
While a Buildroot compilation can be done on almost any Linux system, I prefer Ubuntu or Ubuntu-based distros for this. I suggest you use the same, and please keep in mind that this tutorial and the command used on it have Ubuntu-based distros in mind. By the way, if you are Windows lover and don’t want to dual boot Linux, you can always create a virtual machine to run Linux on.
Disk space >60 GB
Building the latest build of Dahlia OS on my Linux distribution took up more than 35GB. To be safe, I recommend having atleast 60 GB of free space on your storage drive. If you are doing this on a virtual machine, you could also allot it a lot more than that. Why is that? Because, we will be setting up a build environment on this system. So, you could actually use the same setup for building other stuff later on.
CPU with >4 Cores
The build process is CPU intensive. The building speed will depend a lot on how many cores your CPU has. I have been able build this successfully even on a 2 Core virtual machine. But, I recommend doing this on atleast a quad-core CPU, for the fastest speed possible.
RAM >10 GB
The DahliaOS team recommends having atleast 10GB of RAM on the system compiling the OS. Not having 10GB RAM doesn’t mean your build will necessarily fail. But, the chances still persist.
Stable Internet Connection
The speed of the build also depends on the internet connection. This is because buildroot does download a lot of stuff and compile it on spot. So, I recommend you connect via Ethernet if you have a spotty WiFi connection.
That forms the basic requirements. The required software and packages will be dealt with under the relevant sections of the process accordingly. So, let us begin with the process.
Setup build environment for DahliaOS
As I already said, before building DahliaOS, we have to make sure that our Ubuntu system is capable of building the OS. That’s what we will do now. Follow these steps properly.
Step 1. Update the system and install build essentials
- Open a terminal and type
sudo apt update && sudo apt upgradeand press Enter. - Reboot the system (not compulsory, but recommended).
- Open a terminal and type
sudo apt install build-essential libgtk-3-dev clang syslinux-utils ccd2iso gobject-introspection cmake ninja-build nanoand press Enter.
Step 2. Install Dart SDK
- Open a terminal and type
sudo apt install apt-transport-httpsand press Enter. - Type
wget -qO- https://dl-ssl.google.com/linux/linux_signing_key.pub | sudo gpg --dearmor -o /usr/share/keyrings/dart.gpgand press Enter. - Then, type
echo 'deb [signed-by=/usr/share/keyrings/dart.gpg arch=amd64] https://storage.googleapis.com/download.dartlang.org/linux/debian stable main' | sudo tee /etc/apt/sources.list.d/dart_stable.listand press Enter. - Update the deb database again by typing
sudo apt updateand press Enter. - Finally, to install Dart, type
sudo apt install dartand press Enter.
Step 3. Download and extract Flutter SDK
- Download the latest stable Flutter SDK (tar.xz) to the Downloads folder in your home directory.
- Open a terminal and make sure you are in the home directory. If unsure, type
cd ~and press Enter. - Then, type
tar xf ~/Downloads/flutter_linux_2.10.5-stable.tar.xzand press Enter. This will extract Flutter SDK to the home directory. You might have to change the filename according to the latest version you downloaded.
Step 4. Add Flutter SDK to path
This step is important, failing which the build will throw errors later on.
- Open a terminal. Type
sudo nano ~/.bashrcand press Enter. - Go to the last line of the document and add
export PATH="$HOME/flutter/bin:${PATH}". - Press Ctrl+S first and then Ctrl+X to save the changes and exit.
- Restart the terminal, i.e., close the current terminal window and start a new one.
- To check if Flutter installation was successful, type
flutterand press Enter. If it says, command not found, you should worry, but if brings up the help page for Flutter, continue. - On the terminal, type
flutter config --enable-linux-desktopand press Enter.
With that, we have setup the build environment for DahliaOS successfully. Flutter and Dart SDKs are an important part of the setup, not just for building DahliaOS images. They will also help you develop apps for the OS.
Now, we are ready to download DahliaOS source and build images to boot off of.
Build DahliaOS from source
In this tutorial, we are going to be building the OS in a folder in the Home directory. If you plan to build on a different drive or folder, you will have to adjust the commands accordingly.
Step 1. Download DahliaOS source and add necessary patch(es)
- Download the libglib2 patch for the build to the Downloads folder.
- Open a terminal. Making sure you are in the Home directory, type
git clone https://github.com/dahliaOS/buildroot.gitand press Enter. - Type
cd buildroot. - Move the libglib2 patch to the relevant folder by typing
cp $HOME/Downloads/0004-glib-safe-close.patch package/libglib2and pressing Enter.
With that, we are ready to proceed to the final step of the process, i.e., starting the compilation.
Step 2. Build Dahlia OS using make
- On the terminal, make sure you are in the buildroot directory. If undure, type
cd $HOME/buildrootand press Enter. - If you would like to change anything in the build like the kernel settings or the busybox settings, type these commands, as necessary:-
make menuconfigmake busybox-menuconfigmake linux-menuconfig
- When satisfied with the settings, type
makeand press Enter.
Sit back! Order your favourite takeout or go on a trip. Well, the last one might have been a stretch. But, be prepared to wait a long time, depending on your system’s specs and internet speed, it might take a few hours to complete. To give you an idea, my VM with 10GB RAM and 4 cores took about 6 hours for the build to complete.
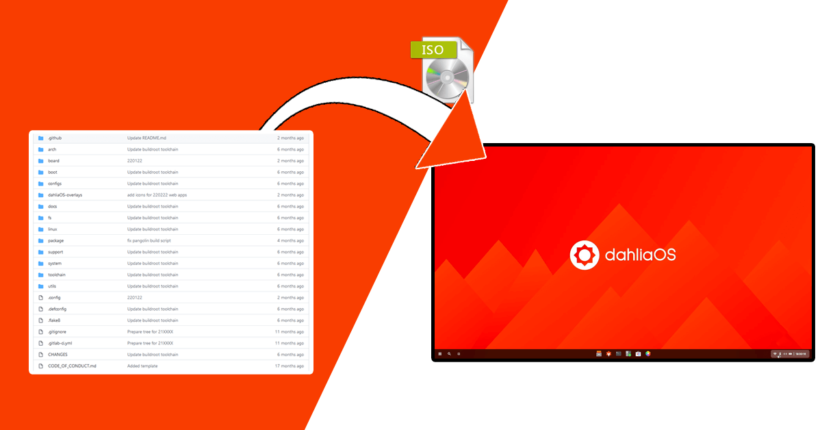
Once the build is complete, you will find the images in the output/images folder within the buildroot directory.
The ISO will be named rootfs.iso9960 while you will also have the images in .cpio and .cpio.xz formats.
If you did follow every instruction properly, you should have been able to boot into base DahliaOS which is nothing but a simple looking OS with three terminals. You probably weren’t looking for this, I know. What you were hoping to see on the first boot is the Pangolin Desktop Environment. So now, we will see how you could integrate Pangolin DE to DahliaOS.
Build DahliaOS with Pangolin Desktop
- Open a terminal in the buildroot directory, type
cp -rvf dahliaOS-overlays/* output/targetand press Enter. - Re-compile the image with Pangolin by typing
makeand press Enter.
This build will not take a lot of time. For me, it completes within 15 minutes. Again, you can look for the images in the output/images folder.
That’s it my dear, readers! I hope you were able to build DahliaOS from scratch using this tutorial.
Conclusion
At last, but not the least, I would like to extend special thanks to /usr/apple, quintenvandamme and systemd for the win from the DahliaOS Discord group for all the help. By the way, if you need any help figuring out any issues that pop up, leave a comment below and I will get back to you.

What are the requierments for this to work?
Hi, is it possible that you could make Dhalia OS for ps4 release?
Once it is stable and the final release is available, yes.
thanks, it would be great. This OS looks very nice.
Pangolin looks like Chrome or Gnome if you are into that “modern” look and forced workflow. However, if you can’t use your desktop computer as if it were a true real-life “desktop” then you might as well use a tiling window manager like i3 and have a pretty wallpaper to stare at rather than a hideous blood red orange screen… Better yet, why bother with a desktop environment considering the “modern” desktop-environment “aesthetics”. Most users would rather appreciate flexibility and customization options to fit their desired workflow. Hopefully Fuchsia will lose steam and die out. Google is creepy. Linux or Windows is preferable to this made-for-Cloud nonsense.
My Wi-Fi ALFA dongle doesn’t work ,nothing showing in network connections when i boot up the OS from usb.
MediaTek Inc. MT7612U 802.11a/b/g/n/ac Wireless Adapter
I thought this OS was using the Linux kernel ,my wi-fi chip has been in the kernel for a while now..
It does use Linux kernel. But, you might have to re-compile the kernel with your WiFi driver activated (given it actually exists in the upstream kernel version you are trying to build).
Ok ,haven’t done that in a while ,i’ll give it a go ,thanks !